Xgboost Version Not Compiled With GPU Support – Explained
In machine learning, the hope of boosting algorithms with GPU-supported XGBoost is shattered when it’s discovered that the installed version lacks this crucial feature, leading to disappointment and dashed dreams.
This error arises due to several reasons like missing GPU drivers, Improper XGBoost installation, and absence of a GPU-supported XGBoost version.
In this article, we will explore the reasons behind a GPU-lacking XGBoost version and provide strategies to enhance your machine-learning experience even without GPU acceleration.
Unlocking XGBoost’s Potential: A Guide to GPU Support:
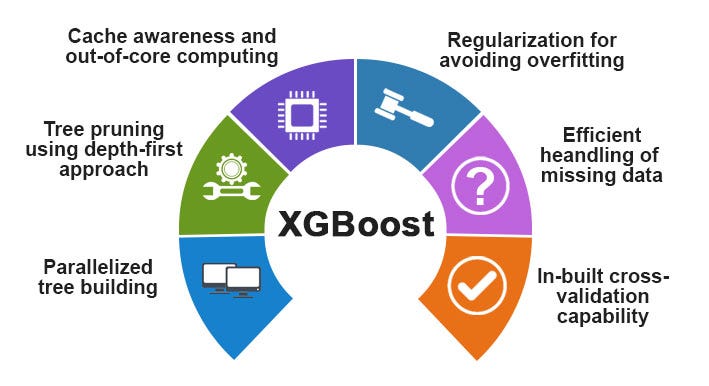
XGBoost, or Extreme Gradient Boosting, is a popular machine learning algorithm celebrated for its exceptional performance and adaptability.
What sets XGBoost apart is its ability to utilize Graphics Processing Units (GPUs) for faster training and improved handling of large datasets.
This GPU support enables parallel processing, significantly speeding up model training, and benefits from the GPU’s dedicated memory, which is often faster and more spacious than CPU memory, allowing XGBoost to efficiently handle large datasets without memory limitations commonly seen in CPU-based implementations.
Why Your XGBoost Version May Lack GPU Support: Explained:
When you encounter the message “XGBoost version doesn’t support GPU,” your XGBoost installation lacks the necessary components for efficient GPU usage. Several factors can cause this issue, as detailed below:
1. Missing GPU Drivers:
XGBoost won’t be able to utilize the GPU if the correct GPU drivers are not installed on your machine. To use XGBoost with your GPU, ensure you have the valid drivers and dependencies installed for your operating system and hardware.
Different XGBoost versions may need various dependencies, so check official documentation or forums for compatibility information.
If you can’t install or update GPU drivers, don’t worry. XGBoost can still work well with just the CPU, although it may be slower. To compensate, improve other aspects like feature engineering and hyperparameter tuning.
2. Improper XGBoost Installation:
If you’ve faced GPU-related errors while using XGBoost, your XGBoost version wasn’t built with GPU support. This can occur when you install XGBoost using a standard method, which usually doesn’t include GPU functionality.
3. Absence Of GPU-Supported XGBoost Version:
You may be using an outdated or incompatible XGBoost version that doesn’t enable GPU acceleration. As datasets become more complex and speed is crucial, GPUs have become essential.
Nevertheless, it’s worth mentioning that XGBoost can still deliver impressive results without GPU support. Many machine learning experts have achieved excellent performance using only the CPU-powered version.
Troubleshooting XGBoost GPU Support Compilation Issues:
Now, let’s systematically tackle each of these potential problems:
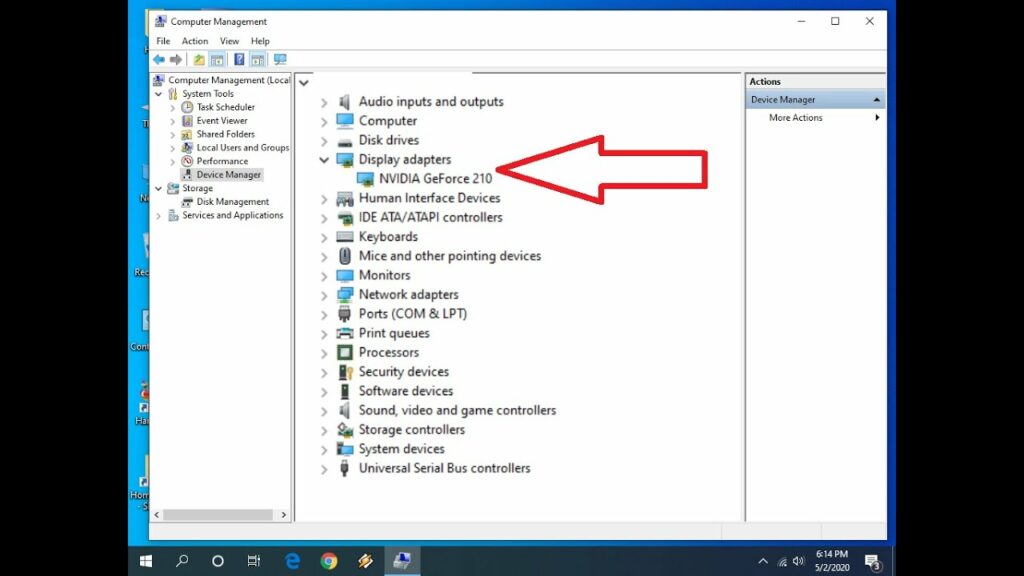
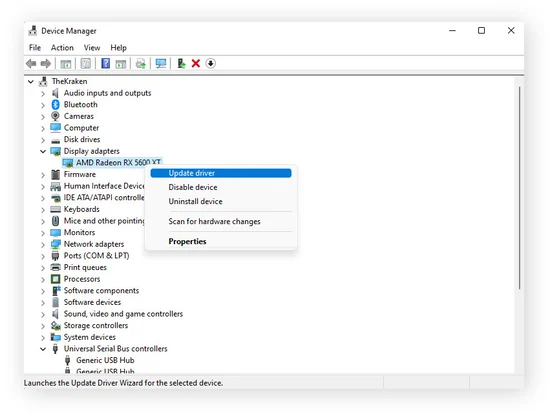
1. Install and Update GPU Drivers:
Outdated or incompatible drivers often lead to compilation errors and hinder performance gains.
- Make certain that your graphics card is equipped with the most up-to-date GPU drivers.
- Visit the manufacturer’s website (e.g., NVIDIA, AMD) to download and install the appropriate drivers.
- Outdated or incompatible drivers can lead to compilation errors and hinder performance gains.
- Start with a solid foundation by downloading the latest driver version compatible with your system configuration.
- Different GPUs may require specific installation steps, and some may necessitate uninstalling old drivers before installing new ones.
2. Verify CUDA Installation:
To ensure that CUDA is correctly installed on your system and compatible with XGBoost’s GPU support, follow these steps:
Check if your system recognizes CUDA:
- Open your terminal.
- Type nvcc -V and press Enter.
- If CUDA is installed correctly, this command will display information about the CUDA version and compilation tools.
Verify the installation with a sample program:
- Navigate to the Samples directory in your CUDA installation folder.
- Find a sample program like “deviceQuery.”
- Compile it using the ‘make’ command.
- Execute the compiled program.
Ensure that it reports successful device detection, indicating that your CUDA installation is working correctly and provides the necessary hardware and drivers for XGBoost’s GPU support.
3. Verify the installation of XGBoost:
“To confirm the presence of XGBoost on your system, open a Python environment and execute the following command:”
import xgboost
If you encounter no errors, it indicates that XGBoost is correctly installed and ready for use.
4. Install XGBoost with GPU Support:
If you haven’t already installed the GPU-supported version of XGBoost, you can do so using pip with the following command:
pip install xgboost
5. Upgrade XGBoost:
Upgrading to the latest version of XGBoost is recommended, as older versions may not have GPU support.
pip install –upgrade xgboost
6. Rebuild XGBoost:
To enable GPU support for XGBoost, you might have to recompile it manually, and here are the key steps:
- Check XGBoost Documentation: Refer to the XGBoost documentation for your platform-specific instructions.
- Install Necessary Libraries: Ensure you have the required libraries like OpenCL or CMake installed on your system.
- Verify Library Linking: Confirm that these libraries are correctly linked during compilation.
- Update Dependencies: Sometimes, you might need to update these libraries to their latest versions for compatibility.
- Handle nvcc Flags: If you encounter errors related to nvcc flags during compilation, like unsupported options or missing files, it may suggest an issue with GPU architecture compatibility.
- Modify -arch Flag: Adjust the architecture flag (-arch) in the compilation settings according to your specific GPU model to resolve compatibility issues.
7. Check GPU Availability:
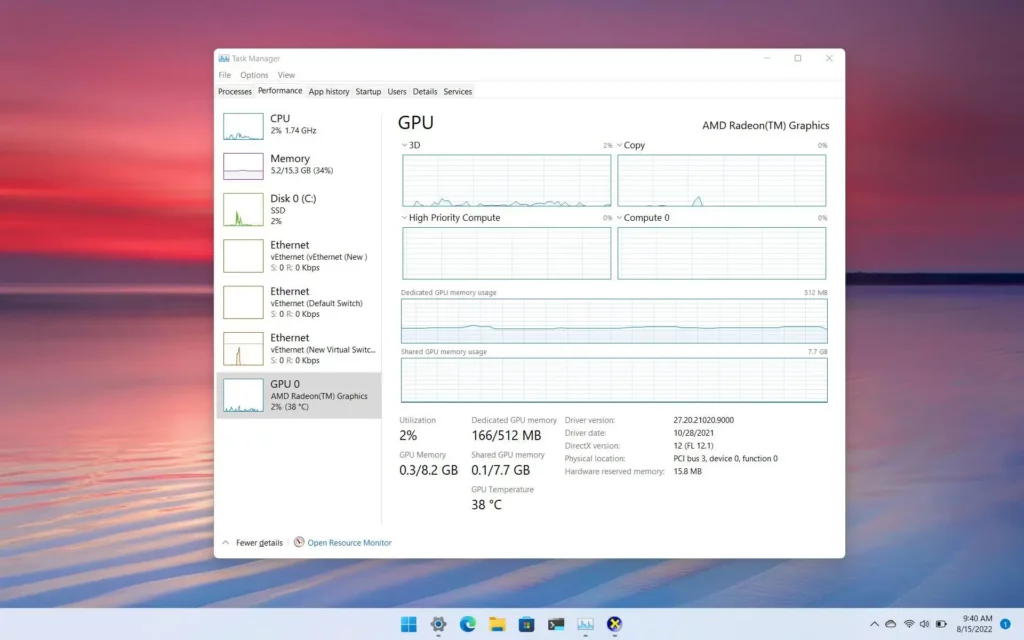
Ensure GPU availability and avoid conflicts by checking for compatibility and proper configuration. Verify that your GPU meets XGBoost’s requirements and is recognized by your system. Test if other applications can utilize the GPU to uncover potential issues.
8. Check Python Environment:
Before proceeding, verifying that you are working in the correct Python environment is crucial, primarily if you use virtual environments like Conda.
- Ensure that XGBoost is installed in the active environment.
- To confirm this, you can use the ‘conda list’ or ‘pip list’ command to check for the presence of XGBoost in your environment.
- Once you confirm the correct environment and XGBoost installation, you can confidently continue your analysis or development tasks.
9. Error Messages and Logs:
When encountering issues, carefully read and analyze any error messages or warnings. Error messages often contain valuable information about the specific problem you’re facing.
- Check Log Files: Besides error messages, check any relevant log files for detailed information about what went wrong. Log files can provide insights into the events leading up to the error.
- Search for Solutions: Use the error message as a starting point to search for solutions. Online forums, documentation, and community support resources are excellent places to find answers or guidance from others who have encountered similar issues.
Frequently Asked Questions:
1. What Is Cuda, And Why Is It Important For Xgboost Gpu Support?
CUDA (Compute Unified Device Architecture) serves as a parallel computing platform and API utilized by XGBoost to facilitate GPU acceleration.
2. Is GPU Support In Xgboost Worth The Effort?
Yes, enabling GPU support in XGBoost can significantly accelerate model training and boost efficiency in machine learning tasks.
3. How Does Xgboost With Gpu Support Differ From The Regular Version?
XGBoost with GPU support utilizes the power of graphics processing units (GPUs) to accelerate training and prediction processes, resulting in significantly faster performance.
4. Can I Enable GPU Support If My Current Xgboost Version Doesn’t Have It?
No, enabling GPU support requires a specific build of XGBoost that includes CUDA integration during compilation. If your current version doesn’t have it, you need to install or compile an arrangement that does.
5. Are There Any Hardware Requirements For Using Gpu Support In Xgboost?
Yes, you need a compatible GPU and appropriate GPU drivers to use GPU support in XGBoost. Ensure that your GPU meets the minimum requirements specified by XGBoost and that you have the necessary drivers installed.
Conclusion:
In conclusion, if your XGBoost version lacks GPU support, there are several potential reasons to consider. One common issue is needing more necessary GPU drivers on your system.
An incorrect installation of XGBoost can also result in a lack of GPU support. It is crucial to ensure that you have a GPU-supported version of XGBoost installed to take full advantage of its capabilities.
If you encounter any problems with GPU support compilation, troubleshooting steps should be taken to identify and resolve any underlying issues.
By addressing these potential roadblocks, you can harness the power of GPU acceleration to enhance the performance and efficiency of your XGBoost models.